SainSmart USB Host shield for Arduino

What is this article all about?

This article explains how to run one of the example applications on the SainSmart USB Host shield on a Arduino Mega.

Another good article is https://hardwarefun.com/tutorials/using-usb-host-shield-with-arduino

The steps to get an example running are

1. Plug in the shield to the Arduino Mega 2560
2. Git clone the Library
3. Add the library to the Arduino IDE, then restart the IDE.
4. Open an example sketch, compile and upload the sketch.
5. Plugin a keyboard, restart the Arduino, inspect the example’s output via the Serial Monitor

Detailed Explanation

The SainSmart USB Host shield contains a MAX3421E chip which allows the Arduino to act as a USB host into which you can plug in USB client devices. The shield can be plugged in to a Arduino Mega 2560. I tested it without modifying the hardware and my Arduino Mega 2560 and the SainSmart USB Host shield still work.

On the software side, the github repository https://github.com/felis/USB_Host_Shield_2.0 conains the library including examples for the SainSmart USB host shield. To run an example, it is necessary to install the library into your Arduino IDE. First use git to checkout the library.

git clone https://github.com/felis/USB_Host_Shield_2.0.git

Open the Arduino IDE and select Sketch > Include Library > Add . Zip Library. A file/folder selector dialog opens. Point the dialog to the folder into which the repository got cloned and finish the import. Restart the Arduino IDE.

After starting the Arduino IDE, select File > Examples > USB Host Shield Library 2.0 > HID > USBHIDBootKbd. Plug a Keyboard into the USB shield, upload the sketch. Open a serial monitor from within the Arduino IDE: Tools > Serial Monitor. Reset the Arduino Mega 2560.

The serial monitor should now output some text whenever you hit a key on the keyboard.

Gotchas

If you get the error: ‘Keyboard’ not found. Does your sketch include the line ‘#include <Keyboard.h>’? you have accidently opened up an example for a board that supports USB natively. Those examples are contained under File > Examples > 09.USB. The examples under 09.USB are not the examples that work with the SainSmart USB Host shield! The working examples are located under File > Examples > USB Host Shield Library 2.0.

RS485 Communication between two Arduinos

RS485 is a bus system for exchanging serial data over relatively long cables. In that sense it is similar to RS232, I2C, SPI, CAN and other standards.

Arduino does not natively support RS485. There are cheap breakout boards that contain a MAX485 chip that convert from the Arduino’s UART TTL voltage levels to the RS485 voltage levels.

The idea of a bus is that a message is put onto the bus and all participants read that message at the same time. Writing to the bus causes collisions if the bus already is written to by one of the other participants. That means only a single participant is allowed to write to the bus at any point.

As RS485 is a bus and hence a way to prevent collisions is needed. On scheme is to have a bus master that talks to slaves via id’s send in messages. Each slave checks if the message contains it’s address and only answers it the Id’s match. For the first test, such an elaborate scheme is not used.

Another way to use the bus is to have one participant send data and all other participants never write to the bus but only receive from the bus.

To test the RS485 transmission, the simple read-only case is used. One Arduino will write to the bus, another Arduino will only read from the bus. The writing Arduino will send an integer between 0 and 180 and the reading Arduino will control a servo and make the servo take a position between 0 and 180 degrees based on the integer that it receives from the RS485 bus. The idea is taken from https://create.arduino.cc/projecthub/maurizfa-13216008-arthur-jogy-13216037-agha-maretha-13216095/modbus-rs-485-using-arduino-c055b5

Lessons learned

Here are some mistake that I made and things I learned. To not let the reader make the same mistakes, here is a list of things to keep in mind before building the setup.

  • When using a breadboard for insert jumper wires, do not forget to bridge the VCC and GND rows at the bottom and at the top of the breadboards together. Initially, the rows do not connect all the way through, they are separated in the middle. I made the mistake to route GND and VCC to the left end of the row and using GND and VCC on the right end of the row without ever bridging left and right side together with the effect that some of the components did not have any power at all.
  • When the RS485 breakout boards are powered up, they light up a red LED. When data is transmitted the LED stays lit. The LED never starts to blink! The LED will not signal transmission, it is RED all the way. RED here is not the color of an error, it is the color of succesfull operation.
  • The Ardunio’s serial pins are used to send data to the RS485 breakout boards. A jumper wire connects the Arduino’s TX and RX pins to the (D)river and (R)eceiver pins on the RS584 breakout board. Whereas a Arduino UNO has a single RX/TX pin pair, the Arduino Mega 2560 has four pairs RX0/TX0 through RX3/TX3. In the sketch, If you want to use the pair RX1/TX1 on the Mega, you have to call Serial1.begin(9600); Serial1.available() and Serial1.read() instead of merely calling Serial. For me it only worked with the RX1/TX1 pair on the Mega and calls to Serial1!
  • A simple pair of wires to connect two RS485 breakout boards together worked for me. There is documentation that mentions to add a resistor between the two A and B wires. I did not add any resistance and the system still worked. The cable used is only about 30 cm long. Maybe the cable is too short to require any resistance, I do not know.

Connecting Components together

I am not a fritzing expert yet, so the image is rather wierd and I apologize. The DI and RO are connected to the serial pins on the arduinos. Also VCC and GND is connected. The Arduino Mega 2560 also drives the servo using pin 9 as a data line. 

Although not visible in the fritzing, the two RS485 modules are connected via two simple wires referred to as A and B in RS485 terminology. There is no resistor used. The resistors on the RS485 modules have not been removed as they form the ends of the bus lines and have to be terminated.

On the sender side, DE and RE are both connected to 5V to enable the driver and disable the receiver.

On the receiver side, both DE and RE are connected to GND to disable the driver and enable the receiver.

Sketches

The sketch for the sender (Arduino UNO) is

int pos = 0;
void setup()
{
Serial.begin(9600);
}
void loop()
{
// sender
// goes from 0 degrees to 180 degrees
// in steps of 1 degree
for (pos = 0; pos <= 180; pos += 1) {
Serial.write(pos);
delay(50);
}
// goes from 180 degrees to 0 degrees
for (pos = 180; pos >= 0; pos -= 1) {
Serial.write(pos);
delay(50);
}
}

The sketch for the receiver (Arduino Mega 2560) is:

include <Servo.h>
Servo myservo;
void setup()
{
Serial.begin(9600);
Serial1.begin(9600);
myservo.attach(9);
}
void loop()
{
// receiver
if (Serial1.available()) {
int angle = Serial1.read();
if(angle<=180)
{
myservo.write(angle);
}
}
}

Servo on Arduino Mega 2560

This post describes how to connect a 5V Servo to an Arduino Mega 2560.

The Servo needs GND, 5V and a data line. The Arduino Mega 2560, once powered via a USB Cable, is able to provide these three signals to the servo.

You can use three male to male jumper wires to connect the servo to the Arduino Mega 2560. Connect the data line to pin 9 on the Arduino Mega 2560 so it directly matches the Sketch outlined below.

As a sketch, the example sketch found under File > Examples > Servo > Sweep worked perfectly. It turns the servo to either ends of it’s 180 degree range.

/* Sweep
by BARRAGAN http://barraganstudio.com
This example code is in the public domain.
modified 8 Nov 2013
by Scott Fitzgerald
http://www.arduino.cc/en/Tutorial/Sweep
*/
include <Servo.h>
Servo myservo; // create servo object to control a servo
// twelve servo objects can be created on most boards
int pos = 0; // variable to store the servo position
void setup() {
myservo.attach(9); // attaches the servo on pin 9 to the servo object
}
void loop() {
for (pos = 0; pos <= 180; pos += 1) { // goes from 0 degrees to 180 degrees // in steps of 1 degree myservo.write(pos); // tell servo to go to position in variable 'pos' delay(15); // waits 15ms for the servo to reach the position } for (pos = 180; pos >= 0; pos -= 1) { // goes from 180 degrees to 0 degrees
myservo.write(pos); // tell servo to go to position in variable 'pos'
delay(15); // waits 15ms for the servo to reach the position
}
}

Assembly Programming and Debugging in Eclipse on Linux

The original article my article is based on is: http://dorkasaurusrex.blogspot.com/2009/05/debugging-assembly-in-eclipse.html. While being good information to achieve the ultimate goal it is outdated in the year 2020 since Eclipse has changed so much since the article was published.

This article will use the 12-2019 Eclipse for C++ developers and the Linux GCC Toolchain to assemble and debug code within Eclipse.

Basically Eclipse 12-2019 is installed. A C++ project is created. A main.S file is added. The compiler and linker options are adjusted. A debug configuration is created and the sample application is compiled and debugged.

Installing and running Eclipse on Linux

The file eclipse-cpp-2019-12-R-linux-gtk-x86_64.tar.gz is downloaded and extracted.

tar -zxvf eclipse-cpp-2019-12-R-linux-gtk-x86_64.tar.gz

A eclipse folder is created. Eclipse can be run with:

./eclipse/eclipse
Create a Project

File > New > C++ Project > C++ Managed Build > Executable > Empty Project > Linux GCC > Name: test

Add an Assembly File

File > New > Source File > main.S

The casing of the filename is in fact relevant! There has to be an uppercase S as an extension. The S extension is used by Eclipse to select the correct tools from the toolchain to assemble and link your application! If you use .s it will not work!

Add assembler code to the main.S file.

.section .data
message: .string "Hello World!\n"

.section .text

# this directive allows the linker to see the "main" label
# which is our entry point
.globl main

# this directive allows the eclipse gdb to see a function called "main"
.func main
main:
mov $4, %eax
mov $1, %ebx
mov $message, %ecx
mov $14, %edx
int $0x80
mov $0, %eax
Adjust the Tool Settings

Project > Properties > C/C++ Build > Settings > Tab: Tool Settings > GCC Assembler > Command line pattern append: -g –gstabs immediately following ${COMMAND}

PIE or NO-PIE

The way Linux, Unix and BSD systems assemble code has changed according to the posts:

https://stackoverflow.com/questions/58106310/nasm-linux-shared-object-error-relocation-r-x86-64-32s-against-data

https://stackoverflow.com/questions/46123505/assembling-with-gcc-causes-weird-relocation-error-with-regards-to-data

Instead of using absolute addresses, the 64 bit way of modern assembly is now relocatable assembly. The code listing above is not moden 64 bit relocatable assembly.

The way to get the Linux GCC toolchain to assemble the code anyways is to add the -no-pie flag to the linker:

Project > Properties > C++ Build > Settings > GCC C++ Linker > Command Line Patter > add -no-pie after ${FLAGS}

${COMMAND} ${FLAGS} -no-pie ${OUTPUT_FLAG} ${OUTPUT_PREFIX}${OUTPUT} ${INPUTS}
Create a Debug Configuration

For eclipse to start an application from within the IDE, you have to supply a Run Configuration for normal execution or a Debug Configuration for debugging the application. Run / Debug Configurations are descriptors of an application run. They contain things such as environment variables and command line parameters to the application amongst other options and parameters.

First make sure your application does in fact build properly. In the next step you have to select your binary, that is why you have to be able to build your project.

In our case, in Eclipse, create a new Debug Configuration. As a type select ‘C/C++ Application’. Click Browser and select your binary for the C/C++ Application input field.

Set a breakpoint into the assembler source code and start the Debug configuration.

Powering the SAM7-LA2 Board

I recently aquired a SAM7-LA2 board. The board apparently is very outdated but it was on sale and it does support the ARM7TDMI instruction set.

The problem with the board is that it does not come with a power supply. The power requirements are specified at several locations in the user manual. Wierdly enough the manual says it need 4.5V DC on one page and 6V DC on another. Also the polarity of the power supply is not specified! It nowhere explicitly states that the polarity does not matter and that the board contains a rectifier. So I did not know which polarity to use.

Here is what worked for me:

I used a 6V DC power supply and as polarity, I used positive center. The board is running without getting fried immediately.

When it comes to power supplies you have four things to worry about:

  1. Amount of supplied voltage
  2. Type of supplied voltage AC / DC
  3. Polarity of supplied voltage (in case of DC)
  4. Amount of supplied current

1. For the amout of Voltage, if the circuit needs 6V you have to supply 6V to not damage the circuit. You have to be exact, when it comes to voltage!

2. The voltage is alternating current (AC) when it is consumed out of your wall socket. If your integrated circuit uses directed current (DC) your power supply has to convert AC to DC and output DC. If your circuit uses AC, the power supply has to output AC. If your circuit does not care, it does not matter what the power supply outputs.

3. Polarity is important because if your circuit can only consume DC and within DC a certain type of polarity and you supply the wrong kind, your circuit will be damaged irreversably. Usually a power supply uses a connector that has a pin in the middle which is surrounded by a metal tube on the outside. The pin in the middle is the inner contact the tube is the outer contact. The contacts have to have opposing polarity. If the pin is positive, the tube has to be negative and vice versa. You have to know which polarity setup your circuit requires. Most modern circuits use a rectifier which automatically converts any polarity to the polarity the circuit wants in order to get rid of problems with incorrect polarity. Older circuits may not contain a rectifier and the user is responsible to plug in a power supply having the correct polarity setup. You have to be precise with polarity in order to not irreversably damage your circuit.

4. For current, you have to make sure that your power supply is capable of supplying at least the required amout of current. If your power supply is capable of more current that is usefull but the circuit will only draw as much current as it actually needs at any point in time. So you cannot damage the circuit if you use a power supply that can supply more current. You can compare this to the situation in your gaming desktop PC. Your PC maybe contains a 500 Watt power supply which does not mean that your PC consumes 500 Watt of power at all times. If your graphics card turns itself off, the power consumption drops to maybe 300 Watts. If you play a CPU and GPU intensive game and your graphics card draws power at its max TDP, your PC will maybe use 480 Watts. If you replace your graphics card with a faster model it may draw more power and your 500 Watt powersupply may not able to supply that power causing your PC to turn off during the gaming session. Time to replace the 500 Watt supply by a 800 Watt supply or an even stronger one. Your PC will not take severe damage when there is not enough power to function, it will just stop to function correctly.


STM32F103C8T6 with Eclipse (OpenSTM32) under Mac OSX

Introduction

The System Workbench for STM32 (SW4STM32) aka. OpenSTM32 aka. AC6 Tools is a set of plugins for the popular Eclipse IDE. There are two ways to install OpenSTM32. The first is to add the plugins to an existing installation of Eclipse, the other is to download a flavor of the Eclipse IDE from the ST homepage which has all the plugins preinstalled. This article explains what my experience was installing the preconfigured Eclipse on a MAC including debugging the program on a bluepill with openocd, the arm-none-eabi-gdb and a ST Link v2 programmer.

I used this article as a foundation for my article.

Prerequisits

A word of advice to everybody wanting to use OpenSTM32 on a mac. Make absolutly sure that you are using the latest software packages available. It will not work with outdated software! There is absolutely no backwards compatibility. If your versions are off, the tools just do not work together. They just fail without usefull error messages!

Use the latest version of

Download and Install OpenSTM32

wget --no-check-certificate http://www.ac6-tools.com/downloads/SW4STM32/install_sw4stm32_macos_64bits-v2.9.run
chmod +x install_sw4stm32_macos_64bits-v2.9.run
./install_sw4stm32_macos_64bits-v2.9.run
Error: Unrecognized option: -d64

If you get this error:

Unrecognized option: -d64
Error: Could not create the Java Virtual Machine.
Error: A fatal exception has occurred. Program will exit.

The solution is to run the installer with root priviledges.

sudo ./install_sw4stm32_macos_64bits-v2.9.run -m -f
Opening the OpenSTM32
open -a /Applications/Ac6/SystemWorkbench.app
Creating a Project

Create a C project as outlined here.

In Eclipse, select File > New > Project > C Project

As Project Type: Empty Project

As Toolchain: Ac6 STM32 MCU GCC

Keep Debug and Release builds checked.

In the wizard step “Target Configuration” switch to the MCU Tab, select

Series: STM32F1

Mcu: STM32F103C8Tx

In the Firmware Configuration Dialog, choose Hardware Abstraction Layer (Cube HAL). The Standard Peripheral Library (StdPeriph) is discontinued and I was not able to get the StdPeriph working.

Error: The Project Importer fails to install

If you get this error:

'tar' failed to extract /Applications/Ac6/SystemWorkbench.app/Contents/Eclipse/plugins/fr.ac6.mcu.ide_2.9.0.201904120827/resources/project_importer/macosx/ProjectImporter.app.tar.bz2 to /Applications/Ac6/SystemWorkbench.app/Contents/Applications

the solution is to manually untar the file:

cd /Applications/Ac6/SystemWorkbench.app/Contents/Eclipse/plugins/fr.ac6.mcu.ide_2.9.0.201904120827/resources/project_importer/macosx
sudo bzip2 -d ProjectImporter.app.tar.bz2
sudo tar xopf ProjectImporter.app.tar
sudo cp -R ProjectImporter.app /Applications/Ac6/SystemWorkbench.app/Contents/Applications
Error: The compiler fails to install
Failed to extract '/Applications/Ac6/SystemWorkbench.app/Contents/Eclipse/plugins/fr.ac6.mcu.externaltools.arm-none.macos64_1.17.0.201812190825/tools/st-gnu-arm-gcc-7-2018-q2-update_gdb-5_4-2016q3-mac.tar.bz2' to '/Applications/Ac6/SystemWorkbench.app/Contents/Eclipse/plugins/fr.ac6.mcu.externaltools.arm-none.macos64_1.17.0.201812190825/tools/compiler' (tar returned '1')
java.lang.Throwable

The solution is to install the compiler manually:

cd /Applications/Ac6/SystemWorkbench.app/Contents/Eclipse/plugins/fr.ac6.mcu.externaltools.arm-none.macos64_1.17.0.201812190825/tools
sudo bzip2 -d st-gnu-arm-gcc-7-2018-q2-update_gdb-5_4-2016q3-mac.tar.bz2
sudo tar xopf st-gnu-arm-gcc-7-2018-q2-update_gdb-5_4-2016q3-mac.tar
sudo ln -s ./st-gnu-arm-gcc-7-2018-q2-update_gdb-5_4-2016q3-mac ./compiler
Write a small C Program

In order to test debugging you need a small application which is large enough to place some breakpoints in for testing. My example does not make any sense at all so do not question the application too much.

int main(void)
{
  int i = 0;

  while (1) {

    i++;

    if (i == 100)
    {
      i = 0;
    }
  }

  return 0;
}

The application should now compile in Eclipse without errors.

There are two error messages that are apparently caused by the Eclipse code scanner as explained here.

Program “arm-none-eabi-g++” not found in PATH testf7 Project Properties, C++ Preprocessor Include.../Providers, Ac6 SW4 STM32 MCU Built-in Compiler Settings options C/C++ Scanner Discovery Problem
Program “arm-none-eabi-gcc” not found in PATH testf7 Project Properties, C++ Preprocessor Include.../Providers, Ac6 SW4 STM32 MCU Built-in Compiler Settings options C/C++ Scanner Discovery Problem 

If you get these two errors, you can just select and delete them as they are bogus messages more or less and they do not cause your build to fail.

Install gcc-arm-none-eabi on macos

https://developer.arm.com/tools-and-software/open-source-software/developer-tools/gnu-toolchain/gnu-rm/downloads

download and unzip the latest version of gdb

sudo cp -R /Users/<username>/Downloads/gcc-arm-none-eabi-9-2019-q4-major /usr/local/gcc_arm

In eclipse in the debug configuration change the gdb command path
Debugger-Tab > GDB command >

Install OpenOCD

brew install open-ocd

OpenOCD Configuration Script

OpenOCD is used in the OpenSTM32 build sequence to establish a connection to the bluepill. gdb will then be used to debug the application over the connection that openocd has established.

To configure how openocd establishes the connection, you have to write a configuration script. In Eclipse, debugging or running an application is done using so called run configurations.

You will create a debug run configuration and specify the path to openocd and the configuration script in the run configuration.

According to this post, there is a bug in OpenSTM32 were the openocd configuration script is not allowed to be located within the Eclipse project but in some other folder. Because of this bug, create the configuration script in some folder but not in the project folder.

I keep my configuration scripts in the folder:

/Users/<username>/Documents/board_config_files/bluepill_debug.cfg

Here is the script that works for me:

source [find interface/stlink-v2.cfg]
 
set WORKAREASIZE 0x5000
 
transport select "hla_swd"
 
set CHIPNAME STM32F103C8Tx

# added
set BOARDNAME genericBoard

# added
# CHIPNAMES state
set CHIPNAME_CPU0_ACTIVATED 1
 
# Enable debug when in low power modes
set ENABLE_LOW_POWER 1
 
# Stop Watchdog counters when halt
set STOP_WATCHDOG 1
 
# STlink Debug clock frequency
#set CLOCK_FREQ 4000
#set CLOCK_FREQ 1000
set CLOCK_FREQ 950
 
# We do not connect RESET line to stlink, that's why reset is disabled.
#reset_config none
reset_config none separate
 
source [find target/stm32f1x.cfg]
Create a Run Configuration for Debugging

Open the pull down menu on the Debug button (Button with a green bug on it) in the toolbar. Select “Debug Configurations…”. A dialog opens. Select Ac6 STM32 Debugging and then click the Document button with the small golder plus symbol on it to create a new Debug Run Configuration of the type Ac6 STM32 Debugging.

Here are the settings to make on the Debugger-Tab:

Start Debugging

A breakpoint causes the debugger to pause the microcontroller as soon as it executes the code the breakpoint was set on. You can set breakpoints everywhere which is a bit misleading as for example you can place a breakpoint on an empty line. Obviously there is no code generated for empty lines and the debugger cannot stop on an empty line. It will only stop on lines that actually translate to code that can be executed by the microcontroller. Eclipse will move breakpoints around before starting the application. If a breakpoint is not on a sensical location, Eclipse will move it to the next sensical location.

To set a breakpoint, double click left of a line number. A small blue dot appears. To get rid of a breakpoint, double click the blue dot and it disapears.

In this example, there is a breakpoint on line 25 of our example application:

Whenever i has been incremented to the value 100, the breakpoint will be hit.

Now that you have an application to debug and a breakpoint that makes sense, you can start the debugging session. To start the session, Select your Run Configuration from the Debugging drop down on the toolbar.

Eclipse will compile your application with debug symbols. It will connect to the board using openocd. It will upload the code via the openocd connection and it will start the gnu debugger gdb and connect it to the openocd server which allows gdb to debug the application on the hardware. Eclipse will switch to the debug perspective and it will break on the breakpoint.

The output during application start should be something similar to this:

Open On-Chip Debugger 0.10.0
Licensed under GNU GPL v2
For bug reports, read
  http://openocd.org/doc/doxygen/bugs.html
none separate
Info : The selected transport took over low-level target control. The results might differ compared to plain JTAG/SWD
adapter speed: 1000 kHz
adapter_nsrst_delay: 100
none separate
Info : Unable to match requested speed 1000 kHz, using 950 kHz
Info : clock speed 950 kHz
Info : STLINK v2 JTAG v29 API v2 SWIM v7 VID 0x0483 PID 0x3748
Info : using stlink api v2
Info : Target voltage: 3.132308
Info : STM32F103C8Tx.cpu: hardware has 6 breakpoints, 4 watchpoints

In the debugger you can look at variable values and you can single step through the code. If there are errors and you cannot figure out what the issue is by solely thinking about the issue, you can use a debugger to see what decision your code makes and you can figure out what decision making is happening and where the incorrect decisions are made. You can then fix the issues.

Do not forget to write unit tests for your code! Do not get into bad code-and-fix habits! Maybe, if the problem lends itself to it, give test-driven development a shot.

Error: error in final launch sequence

If you get the “error in final launch sequence” – error, make sure you are using the latest gcc-arm-none-eabi. If the versions of the tools do not match, errors such as this one arise.

Error: dyld: Library not loaded: requires version 3.0.0 or later, but

If you get this error message:

dyld: Library not loaded: /usr/local/opt/libusb/lib/libusb-1.0.0.dylib
  Referenced from: /usr/local/opt/libftdi/lib/libftdi1.2.dylib
  Reason: Incompatible library version: libftdi1.2.dylib requires version 3.0.0 or later, but libusb-1.0.0.dylib provides version 2.0.0

then your libusb versions are out-dated.

For me the libusb files in

/Applications/STMicroelectronics/STM32Cube/STM32CubeProgrammer/STM32CubeProgrammer.app/Contents/MacOs/Drivers/FirmwareUpgrade/native/mac_x64/libusb-1.0.0.dylib
/Applications/STMicroelectronics/STM32Cube/STM32CubeProgrammer/STM32CubeProgrammer.app/Contents/MacOs/bin/libusb-1.0.0.dylib
/Applications/Ac6/SystemWorkbench.app/Contents/Eclipse/plugins/fr.ac6.mcu.externaltools.openocd.macos64_1.23.0.201904120827/tools/openocd/lib/libusb-1.0.dylib
/Applications/Ac6/SystemWorkbench.app/Contents/Eclipse/plugins/fr.ac6.mcu.externaltools.openocd.macos64_1.23.0.201904120827/tools/openocd/lib/libusb-1.0.0.dylib

are all outdated.

You can check this using the otool command:

otool -L /usr/local/opt/libusb/lib/libusb-1.0.0.dylib

/usr/local/opt/libusb/lib/libusb-1.0.0.dylib:
  /usr/local/opt/libusb/lib/libusb-1.0.0.dylib (compatibility version 3.0.0, current version 3.0.0)
  /usr/lib/libobjc.A.dylib (compatibility version 1.0.0, current version 228.0.0)
  /System/Library/Frameworks/IOKit.framework/Versions/A/IOKit (compatibility version 1.0.0, current version 275.0.0)
  /System/Library/Frameworks/CoreFoundation.framework/Versions/A/CoreFoundation (compatibility version 150.0.0, current version 1575.17.0)
  /usr/lib/libSystem.B.dylib (compatibility version 1.0.0, current version 1252.250.1)

For a correct libusb as outlined above, the output says that the libusb library has a compatibility version of 3.0.0 and a current version of 3.0.0. If your libusb versions deviate, install libusb using brew (brew install libusb) then check where the brew files are (brew list libusb) and then replace the outdated libs with the current libs from brew.

Install a new version of libusb using brew (brew install libusb) then create backups of the four outdated files and copy the new libusb files over

cd /Applications/STMicroelectronics/STM32Cube/STM32CubeProgrammer/STM32CubeProgrammer.app/Contents/MacOs/Drivers/FirmwareUpgrade/native/mac_x64
sudo mv libusb-1.0.0.dylib libusb-1.0.0.dylib.backup
sudo cp /usr/local/lib/libusb-1.0.0.dylib .

cd /Applications/STMicroelectronics/STM32Cube/STM32CubeProgrammer/STM32CubeProgrammer.app/Contents/MacOs/bin
sudo mv libusb-1.0.0.dylib libusb-1.0.0.dylib.backup
sudo cp /usr/local/lib/libusb-1.0.0.dylib .

cd /Applications/Ac6/SystemWorkbench.app/Contents/Eclipse/plugins/fr.ac6.mcu.externaltools.openocd.macos64_1.23.0.201904120827/tools/openocd/lib/libusb-1.0.dylib
sudo mv libusb-1.0.0.dylib libusb-1.0.0.dylib.backup
sudo mv libusb-1.0.dylib libusb-1.0.dylib.backup
sudo cp /usr/local/lib/libusb-1.0.0.dylib .
sudo cp /usr/local/lib/libusb-1.0.dylib .
Make an LED Blink

Making an LED Blink is described here.

For those coming from a high-level application programming background, a word of advice:

The fact that there is a function called HAL_Delay(500); or osDelay(1000); does not automatically mean that this function will work without setup code! In microcontroller programming, you have to first set up the hardware clock before you can make use of it via waiting functions such as the delay functions!

Same goes for LEDs. You have to first setup the LEDs before you can toggle them. The example given in this article shows how to perform the initial setup which is necessary to periodically make an LED blink. I will duplicate the code here for reference.

#include "stm32f1xx.h"

void SystemClock_Config(void) {

  RCC_ClkInitTypeDef clkinitstruct = { 0 };
  RCC_OscInitTypeDef oscinitstruct = { 0 };

  oscinitstruct.OscillatorType = RCC_OSCILLATORTYPE_HSE;
  oscinitstruct.HSEState = RCC_HSE_ON;
  oscinitstruct.HSIState = RCC_HSI_OFF;
  oscinitstruct.PLL.PLLState = RCC_PLL_ON;
  oscinitstruct.PLL.PLLSource = RCC_PLLSOURCE_HSE;
  oscinitstruct.PLL.PLLMUL = RCC_PLL_MUL9;
  if (HAL_RCC_OscConfig(&oscinitstruct) != HAL_OK) {
    while (1)
      ;
  }

  clkinitstruct.ClockType = (RCC_CLOCKTYPE_SYSCLK |
  RCC_CLOCKTYPE_HCLK |
  RCC_CLOCKTYPE_PCLK1 |
  RCC_CLOCKTYPE_PCLK2);
  clkinitstruct.SYSCLKSource = RCC_SYSCLKSOURCE_PLLCLK;
  clkinitstruct.AHBCLKDivider = RCC_SYSCLK_DIV1;
  clkinitstruct.APB2CLKDivider = RCC_HCLK_DIV1;
  clkinitstruct.APB1CLKDivider = RCC_HCLK_DIV2;
  if (HAL_RCC_ClockConfig(&clkinitstruct, FLASH_LATENCY_2) != HAL_OK) {
    while (1)
      ;
  }
}

// https://www.onetransistor.eu/2017/12/program-stm32-bluepill-hal-eclipse.html
int main(void) {

  HAL_Init();
  SystemClock_Config();

  __HAL_RCC_GPIOC_CLK_ENABLE();

  GPIO_InitTypeDef gpio;
  gpio.Mode = GPIO_MODE_OUTPUT_PP;
  gpio.Speed = GPIO_SPEED_FREQ_MEDIUM;
  gpio.Pin = GPIO_PIN_13;
  gpio.Pull = GPIO_PULLUP;

  HAL_GPIO_Init(GPIOC, &gpio);

  while (1) {
    HAL_GPIO_TogglePin(GPIOC, GPIO_PIN_13);
    HAL_Delay(500);
  }
}

In order for this code to compile correctly, you have to add the FreeRTOS utility.

Output an Assembler Listing of the Binary

As outlined here, you can add a command to the post build step to call arm-none-eabi-objdump on your binary to disassemble it and output a listing file.

Open the preferences of your project > C / C++ Build > Settings > Tab: Build Steps > PostBuild Steps > Command.

Append to the command:

; arm-none-eabi-objdump -D "${BuildArtifactFileBaseName}.elf" > "${BuildArtifactFileBaseName}.lst"

Do not forget to prefix the semicolon! The semicolon will append a new command to the post build step.

The result is a .lst file in the debug folder that contains the assembly listing.

STM32F103C8T6 with Arduino IDE

Add the Arduino STM32 core. Goto https://github.com/rogerclarkmelbourne/Arduino_STM32 and download the entire repository as a zip file. Extract the zip file to ~/Documents/Arduino/hardware on a mac, My Documents\Arduino\Hardware on windows. If the hardware folder does not exist, create it. If your zip file extracts to anything other than a folder called Arduino_STM32, rename it to Arduino_STM32.

Add the Arduino SAM Board Manager from within the Arduino IDE. Open Tools > Board > Boards Manager and search for SAM. Install that Board Manager (Arduino SAM Boards).

As Board choose Generic STM32F103 Series. As Variant selectSTM32F103C8 20K Ram 64K Flash. As Upload Method choose serial. CPU speed 72Mhz normal.

Connect the STM 32 microcontroller to the USB serial adapter and that adapter to your PC via usb. The USB Adapter has to be switched to 3.3 Volts using the jumper.

If you look at the Adapter so that the USB connection points away from you and the pins point towards you, we will number the pins from left to right (Pin 1, Pin 2 (TX) , Pin 3 (RX), Pin 4, Pin 5 (VDD), Pin 6 (GND))

The USB adapter will supply power to the microcontroller because it is connected to the PC via USB. To route the power to the microcontroller, connect GND from the adapter to the GND pin on the Microcontroller and the 3.3Volt line to the 3.3V input on the Microcontroller.

For the data transfer via the serial protocol, connect TX and RX. The documentation says that TX is Pin PA9 on the Microcontroller and Pin 2 on the Adapter. RX is Pin PA10 on the Microcontroller and Pin 3 on the Adapter.

In order for the Microcontroller to write data from the serial pins into the flash, place the jumper BOOT 0 into the position labeled with a 1.

In the Arduino IDE, select a blink sketch. File > Examples > A_STM_Examples > Digital > Blink. There is also a General > Blink which you should not use. Use the Digital > Blink.

No change PB1 in the code to PC13 because this is the on board LED on the STM32F103C8T6 boards. There are several occurences in the sketch, replace all of them.

Upload the sketch to the board which makes the LED blink.

As a sidenote, I tried programming the board after putting in on the yellow pins that came with the controller and connecting the USB serial adapter via cables plugged into the breadboard and not directly into the Microcontroller Board. I could not programm the board even once using the yellow pins! It just would not work. I think the proper way is to solder connectors onto the Microcontroller board.

STM32CubeMX on MacOS

Installation on MacOS

Installing STM32CubeMX 5.5.0 on MacOS is not as obvious as it should be. Instead of running the .app file, use the java command to run the .exe file!

java -jar SetupSTM32CubeMX-5.5.0.exe

Source: STM Forums.

This will install the application without admin rights into your user folder: /Users/<username>/STM32CubeMX.app

There is an uninstaller in

/Users/<username>/STM32CubeMX.app/Contents/Resources/Uninstaller

Starting STM32CubeMX
/Users/<username>/STM32CubeMX.app/Contents/MacOs/STM32CubeMX
Creating a Project

Which Toolchain / IDE? Is MDK-ARM correct?

Code Generation

Error:

The code is successfully generated under <path> but MDK-ARM V5.27project generation have a problem.

2020-01-22 07:39:02,255 [INFO] ProjectBuilder:1843 - Time for Copy HAL[1] : 141mS.
this is project Generator
2020-01-22 07:39:02,260 [INFO] ProjectBuilder:2428 - Project Generator version: 3.6.0
2020-01-22 07:39:02,702 [INFO] ConfigFileManager:1043 - The Die is : DIE450
2020-01-22 07:39:03,823 [INFO] ToolchainGenerator:364 - [Project Generator] Problem in the project generation
java.lang.NullPointerException
  at generators.KeilGenerator.setDeviceType(KeilGenerator.java:283)
  at convertor.Convertor.generateProject(Convertor.java:874)
  at convertor.Convertor.generateKeilFiles(Convertor.java:1049)
  at convertor.Convertor.generate(Convertor.java:668)
  at convertor.Convertor.convert(Convertor.java:526)
  at convertor.Convertor.generate(Convertor.java:362)
  at com.st.microxplorer.plugins.projectmanager.model.ToolchainGenerator.generate(ToolchainGenerator.java:360)
  at com.st.microxplorer.plugins.projectmanager.engine.ProjectBuilder.createToolChainFolders(ProjectBuilder.java:2562)
  at com.st.microxplorer.plugins.projectmanager.engine.ProjectBuilder.createProject(ProjectBuilder.java:643)
  at com.st.microxplorer.plugins.projectmanager.engine.GenerateProjectThread.run(GenerateProjectThread.java:44)
2020-01-22 07:39:07,763 [INFO] ConfigFileManager:1872 - mx.scratch is deleted!
2020-01-22 07:39:07,764 [INFO] ProjectBuilder:2595 - Time for Generating toolchain IDE Files: 5505mS.
2020-01-22 07:39:07,764 [ERROR] ProjectBuilder:2601 - Error in Project Generation
2020-01-22 07:39:07,764 [ERROR] ProjectBuilder:666 - Error in Project Generation


Uhlenbrock Intellibox IR und P50X

Dieser Artikel beschreibt, wie man das P50X Protokol nutzen kann um von einem PC mit der Uhlenbrock Intellibox IR zu sprechen. Das Augenmerk liegt auf der Programmierung einer Software, die Befehle aus dem P50X Protokol bildet und dann an die Intellibox schickt.

Vor- und Nachteile

Es gibt folgende Vor- und Nachteile. Die Nachteile sind, dass man die Software selber schreiben muss, wenn man nicht WinDigipet, den TrainController, RocRail oder JMRI verwenden möchte. Ein weiterer Nachteil ist, dass man nur mit Hardware sprechen kann, die das P50X Protokoll spricht. Die Uhlenbrock Intellibox IR ist eine solche Hardware und dieser Artikel konzentriert sich auf die Intellibox IR.

Vorteile sind, dass man selbst versteht, was die Software tut und Spaß an der Entwicklung haben kann. Ein weiterer Vorteil ist, dass das P50X Protokoll nicht zu kompliziert und auch gut dokumentiert ist. Man hat eine realistische Chance ein funktionierende Software zu erstellen.

Beispiel Quellcode

Die Software zu diesem Artikel ist unter https://github.com/Thewbi/EasyTrain verfügbar. Es handelt sich um eine Java Program, welches mit Maven übersetzt wird und Java 13 sowie JavaFX als grafische Bibliothek verwendet.

Funktionsumfang

Die Software befindet sich noch mitten in der Entwicklung. Sie besitzt momtentan folgende Funktionalitäten:

  • Elementares Layouting der Anlage (Geraden und Weichen)
  • Schalten der Weichen über ihre digitale Adressen
  • Steuern von Lokomotiven über deren Adressen
  • Auslesen von S88 Kontaktmelderzuständen

Das Ziel der Software soll es sein folgende zusätzliche Funktionen zu erfüllen:

  • Automatikbetrieb, die Software soll bis zu drei Züge über die Anlage bewegen können. Der Benutzer hat keinen Einfluss auf die Routen, die Routen werden von der Software gewählt.
  • Um den Automatikbetrieb wie oben beschrieben zu erreichen muss die Software Routen auf der Anlage berechnen können und Weichen auf den Routen schalten um die Route freizuschalten.
  • Kollisionsvermeidung von Zügen. Ein Block darf nur von einem Zuge belegt werden. Ein belegter Block darf nicht von einem anderen Zuge befahren werden.
Das P50X Protokoll

Märklin hat das P50 Protokoll entworfen. Dieses P50 Protokoll wurde um Befehle erweitert und die erweiterte Variante wird P50X genannt. Gute Beschreibungen gibt es hier und hier.

Befehle können in zwei Formen formuliert werden. Die P50XA Variante, wobei A für ASCII steht, notiert die Befehle mit Hilfe von menschenlesbaren ASCII Zeichen.

Die P50XB Variante, wobei das b für Binär steht, formuliert die Befehle durch Bytes. Die Bytes sind für Menschen schwerer zu entziffern allerdings ist die Programmierung einfacher, weshalb der Beispiellquellcode P50XB Befehle sendet.

Ein P50X Befehl besitzt eine Anfrage an die Intellibox worauf die Intellibox mit einer Antwort reagiert. Es ist also ein Request-Response Muster. Die Programmierung kann also gut strukturiert erfolgen.

Es gibt eine relativ lange Liste an P50X Befehlen. Das Gute ist, dass man nicht alle Befehle implementieren muss um erste Erfolge zu erzielen. Es reicht beispielsweiße aus, den XLok Befehl zu implementieren um eine Lokomotive fahren zu lassen.

Das P50X Protokoll ist zustandslos. Man muss sich nicht einloggen um Sicherheitsvorkehrungen zu erfüllen oder eine Session erstellen um Befehle zu senden. Jeder Befehl steht für sich selber ohne Kontext zu anderen Befehlen.

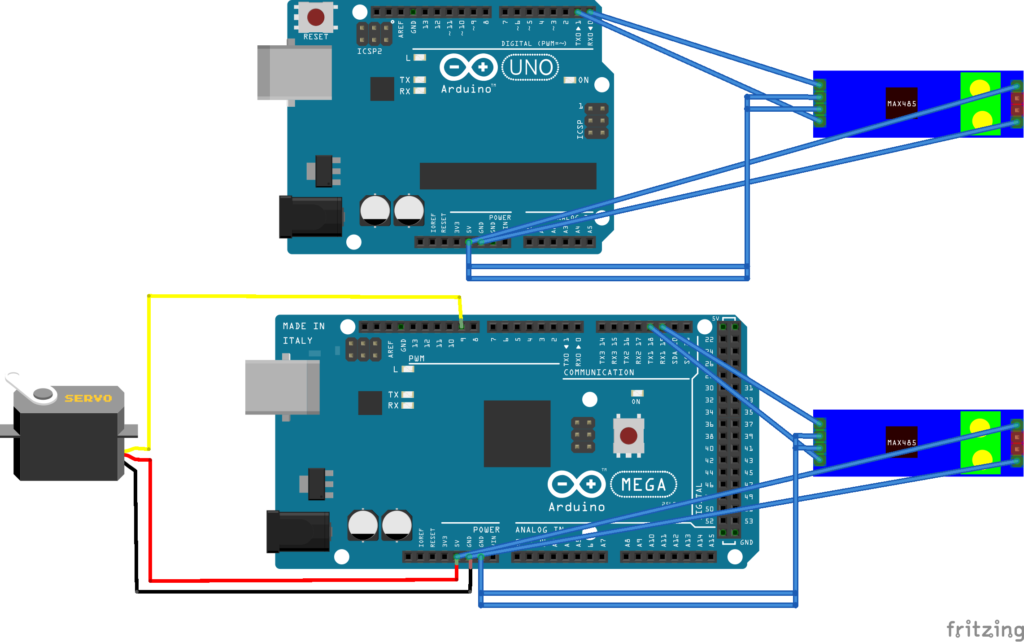
Die Befehle werden über eine serielle RS232 Verbindung gesendet. Diese Verbindung ist lediglich ein Medium und spielt nur eine untergeordnete Rolle. Im Grunde muss die Software Byte-Arrays erstellen und senden sowie empfangen können verarbeiten können.

Beispiel: XLok Befehl

Wir untersuchen das P50XB Protokol am Beispiel des XLok Befehls. Als erstes kann man sich die Dokumentation dieses Befehls durchlesen (XLok 080h).

Danach kann man unter Windows 7 einen Mitschnitt einer existierenden Software (WinDigipet oder TrainController) durchführen. Dazu verwendet man am besten die AccessPort Software von http://sudt.com/en/ap/download.htm. Diese Software kann alle Bytes abfangen und in einer Datei dokumentieren, die über die serielle Schnittstelle an die Intellibox gesendet werden und ebenfalls alles Bytes die die Intellibox an den PC zurücksendet.

Man startet zunächst AccessPort, wählt den COM-Port aus, der mitgeschnitten werden soll und startet dann die Protokollierung. Danach startet man Windigipet oder TrainController und lässt eine Lokomotive fahren.

Es entsteht beispielsweiße folgender Mittschnitt:

37	10:53:09.828	0.00005529	RailTCB32.exe	IRP_MJ_WRITE                        	COM6	SUCCESS	Length: 6, Data: 78 80 02 00 00 60 	
38	10:53:09.863	0.00000894	RailTCB32.exe	IRP_MJ_READ                         	COM6	SUCCESS	Length: 1, Data: 00 

Man kann sehen, das über die serielle Schnittstelle, die Windows als COM6 listet kommuniziert wird. Man kann auch sehen, dass ein WRITE Vorgang und ein READ Vorgang stattfindet. Der PC schreibt also Bytes und liest dann Bytes aus COM6.

Es werden 6 Bytes geschrieben: 78 80 02 00 00 60

Es wird 1 Byte empfangen 00

Die Bedeutung der Bytes kann aus der Beschreibung des XLok Befehls entnommen werden.

78 – Dieses Bytes leitet eine Befehl ein und muss vor jedem Befehl gesendet werden.

80 – Dieses Byte enthält die ID des XLok Befehls (0x80h). Der XLok Befehl hat die ID 80 Hex.

Die Bytes, die jetzt folgen sind Parameter des XLok Befehls und sagen der Intellibox welche Effekte mit dem XLok Befehl erzeugt werden sollen.

02 00 – Die ersten zwei Byte beschreiben die Adresse der Lok, die gesteuert werden soll. In diesem Fall wird die Lok 2 gesteuert.

00 – Das dritte Byte beschreibt die gewünschte Geschwindigkeit, die die Lok annehmen soll. In diesem Fall Geschwindigkeit 0.

60 – Dieses Byte enthält eine detailierte Beschreibung. Das Byte 0x60 entspricht der Bit-Maske 0110 0000. Es sind also die Bits 7 und 6 gesetzt. Bit 7 steht für Force, der Benutzer übernimmt also die manuelle Kontrolle über die Lokomotive. Das Bit 6 steht für die Richtung. Wenn Bit 6 auf den Wert 1 gesetzt ist, fährt die Lok in Vorwärtsrichtung, der Wert 0 führt dazu, dass die Lok Rückwärts fährt, also bei einer Dampflok mit dem Tender zuerst.

Die Antwort der Intellibox lautet 00. 00 ist als Antwort-Code für den XLok Befehl als OK, also eine fehlerfreie Ausführung des Befehls dokumentiert. Lautet die Antwort nicht 00, steht die Antwort für einen Fehlercode und kann zur Fehlersuche verwendet werden. Beispielsweiße wenn eine Adresse angegeben wird, die die Intellibox nicht kennt oder sonstige Fehler.

Wenn man eine Software schreiben möchte, die den XLok Befehl ausführen soll, dann muss man diesen Vorgang einfach umkehren. Man muss einfach selbst einen Array aus 6 Bytes bauen, die Daten einfügen, die man zum Erreichen der eigenen Ziele braucht und diese Daten an die Intellibox schicken.

Die Intellibox führt den Befehl dann aus und schickt die Spannungssignale auf das Gleis um den Decoder in der Lokomotive anzusteuern.

Auslesen der Rückmeldemodule S88

Märklin hat den S88 Standard entwickelt um elektronische Rückmeldungen für belegte Streckenabschnitte zu ermöglichen. Wenn ein Streckenabschnitt durch einen Zug belegt ist, wird dies elektronisch von einem S88 kompatiblen System erfasst. Das System weiß nicht, welche Lok den Abschnitt belegt, es weiß nur, das ein Abschnitt belegt ist.

Die S88 Module werden an die Intellibox angeschloßen. Dabei werden die S88 Rückmeldemodule in Reihe geschaltet. Das erste S88 Modul wird direkt an die Intellibox angeschlossen und enthält dadurch implizit die ID 1. Das zweite S88 Modul wird in Reihe an das erste Modul angeschlossen und enthält dadurch implizit die ID 2. Das dritte Modul wird an das zweite Modul angeschlossen und enthält die ID 3 usw.

Jedes S88 Modul hat 16 Eingänge. Die Intellibox speichert den Zustand jedes S88 Moduls und kann dann per P50X zu jeder Zeit nach den Zuständen der Module gefragt werden.

Eine alternative ist es die Intellibox nach Änderungen der S88 Module zu fragen. Es ist dadurch einfacher den Überblick zu behalten, da man nicht immer alle Module abfragen muss, sondern nur eine Liste der Änderungen erhält.

Wenn man einen Mitschnitt der Windigipet Software analysiert sieht man, dass Windigipet alle 100 Millisekunden einen XEvent (0xC8) sendet. Wenn dieser Befehl zurückmeldet, dass eine Änderung vorliegt, wird Windigipet einen XEvtSen (0xCB) nachsenden um die Liste der Änderungen aus der Intellibox abzufragen.

Die Antwort zum XEvtSen Befehl ist eine Liste aus Bytes. Die Liste enhält einen Eintrag für jedes S88 Modul, in dem sich Änderungen ergeben haben. Jedes Element ist drei Byte lang. Das erste Byte enthält die ID eines der S88 Module, in dem sich Änderungen ergeben haben gefolgt vom neuen Zustand der 16 Anschlüsse dieses S88 Moduls. Die 16 Anschlusszustände sind über 16 Bit also zwei Byte verteilt.

Wenn viele Züge auf der Anlage fahren, werden sich viele S88 Module ändern und die Liste wird mehrere Einträge für alle geänderten S88 Module enthalten.

Eine Steuersoftware hat normalerweiße eine Ansicht des Gleisbildes. In dieses Gleisbild werden die Belegtmelder eingetragen. Pro S88 Modul gibt es 16 Belegmelder. Das erste S88 Modul besitzt die Belegmelder 1 bis 16. Das zweite S88 Modul die Belegtmelder 17 bis 32 usw.

Es ist einfacher den Vorgang anhand eines Beispiels zu erklären.

Wenn XEvtSen mit den Bytes 03 38 1E antwortet, dann hat sich das S88 Modul 3 geändert, da das erste Byte die ID des Moduls angibt und im Beispiel 3 ist.

Das folgende Byte (38) beschreibt die Anschlüsse 9 bis 16 am Modul 3. Das darauf folgende Byte (1E) beschreibt die Anschlüsse 1 bis 8 am Modul 3.

38 entspricht der Bitmaske 0011 1000. D.h. die Eingänge 11, 12, 13 sind belegt. Diese Wert müssen zu (3 – 1) * 16 addiert werden. Es sind also die Blöcke 43, 44, 45 belegt.

1E entspricht der Bitmaske 0001 1110. D.h. die Eingänge 4, 5, 6 und 7 am S88 Modul der ID 3 sind belegt. Die Ids der Belegtmelder errechen sich aus (3 – 1) * 16 + 4 = 36, (3 – 1) * 16 + 5 = 37, (3 – 1) * 16 + 6 = 38 und (3 – 1) * 16 + 7 = 39.

Insgesamt sind also die Gleisabschnitte 36, 37, 38, 39, 43, 44, 45 belegt.

Wenn man die Ids der Belegtmelder aus der Antwort des XEvtSen berechnet hat und diese Ids in das Gleisbild eingetragen worden sind, könnte man das Gleisbild nun z.B. auf den belegten Abschnitten rot malen um anzuzeigen welche Abschnitte belegt sind.

Die Abbildung der S88 Anschlüsse auf Ids sind durch eine mathematische Formel definiert wie oben gezeigt. Welche Anschlüsse wo an die Gleise angeschlossen sind, kann die Intellibox nicht wissen. Diese Information wird daher auch nicht über das P50X Protokoll übertragen.

Nur der Gleisplaner und Anlagenbauer weiß welche Kontakte wo im Gleisbild liegen. Diese Information muss in den Planungsdaten dokumentiert werden, damit andere Menschen eine Chance haben die Anlage zu verstehen. Kein Computerprogramm kann diese Information berechnen, sie muss durch die Eingabe des Gleisbilds in die Software in den Computer eingegeben werden.

Modellierung der Gleise

Gleise werden mit zwei Knoten pro Gleis modelliert. Es gibt pro Durchfahrtsrichtung einen Knoten. Diese Modellierung erlaubt es Fahrtrichtungen in der Pfadfindung zu berücksichtigen. Die Pfadfindung kann nun zwischen einem Richtungswechsel und einer Route zwischen zwei Knoten unterscheiden, die keinen Richtungswechsel benötigt.

Routen ohne Richtungswechsel sind wichtig für Überlandfahrten wichtig. Auf der Modeleisenbahn soll die Wirklichkeit modelliert werden. In der Wirklichkeit wird ein Zug während einer Überlandfahrt, z.B. zwischen zwei Städten, keinen Richtungswechsel durchführen. Richtungswechsel sind nur während Rangierfahrten in einem Bahnhof akzeptabel.

Die Routenfindung soll Routen berechnen, die keinen Richtungswechsel enthalten. Die Art, wie die Routenfindung in dieses Verhalten gezwungen wird erfolgt durch die Modelierung der zwei Durchfahrtsrichtungen in getrennten Graphen. Daher hat jedes Gleis einen Konten pro Durchfahrtsrichtung.

Das folgende Bild zeigt einen Rundkurs mit zwei Weichen und die darin enthaltenen Knoten in den Richtungsgraphen.

Das folgende Bild zeigt die Modellierung von Weichen.

Eine Weiche wird durch zwei Knoten und drei Kanten in drei Himmelsrichtungen modelliert. Kanten dienen dazu Gleise einfach miteinander Verbindung zu können und dabei die Knoten korrekt miteinander zu verbinden. Es darf nicht passieren, das Knoten unterschiedlicher Richtungsgraphen miteinander verbunden werden. Die Graphen sollen getrennt bleiben.

Weichen, gerade und gebogene Gleise sind Sonderfälle des allgemeinen Gleis-Modells. Das allgemeine Gleismodel besitzt zwei Knoten mit denen es an zwei Richtungsgraphen teilnimmt. Das allgemeine Gleismodel besitzt bis zu vier Kanten. Eine Kante pro Himmelsrichtung, in der das Gleis eine Verbindung ausbilden kann. Gerade und gebogene Gleise verwenden zwei Kanten. Weichen verwenden drei der vier möglichen Kanten. Eine Gleisausprägung, die alle vier Kanten verwendet gibt es momentan nicht. Ein Prellbock verwendet nur eine Kante und kann daher nicht durchfahren werden.

Das allgemeine Gleismodell ist prinzipiel als ein quadratisches Feld auf einem zweidimensionalen Feld aus Gleisen modelliert. Gleise können nur in den vier Himmelsrichtungen miteinander verbunden werden. Eine 90 Grad Kurve wird also durch ein einziges Feld modelliert und kann nicht aus beispielsweiße drei Gleisstücken kombiniert werden. Die Gleisestücke auf der Modelleisenbahn und die modellierten Gleise in der Software sind nicht 1:1 aufeinander abgebildet.

Train Controller Bronze AutoTrain

The AutoTrain Feature

The Train Controller Bronze Modelling package allows you to control trains via the Uhlenbrock Intellibox IR.

One way to control a train is to use the AutoTrain feature. The AutoTrain feature allows you to move a train between two blocks. Train Controller will automatically search a route between the two blocks, turn all switches accordingly and drive the train from the start to the finish.

AutoTrain takes away your freedom to specify the route in detail. It is a convenient way to move locomotives if you only care about start and the target of a route but not which blocks are passed in between the start and the end.

First put a train on a block. Click on the block and choose the option “Assign Train”. A list of locomotive opens, select one of the locos and also select one of the orientation boxes. The ‘OK’ button is only activated if a loco and a orientation is selected.

Once a loco is on a block, click on the AutoTrain symbol (‘A’ Symbol) or select AutoTrain from the context menu.

AutoTrain now opens a small dialog window. This window is used to configure what role the blocks have in the route. One block has to be given the start role, the same or another block has to be given the target role.

On the layout select the block you want to start from. This is the block that you put the loco on in the prior step. In the AutoTrain dialog, use the green arrows to assign the start role to the block. There are two arrows which define the direction that the loco will drive when starting the route. Once you clicked the arrow button, the block will be marked green at the direction that the train will start from.

Now you need to assign the target role to a block. The target block can be the same block as the start block. If you assign the start and end role to the same block, Train Controller Bronze will find a circular route. The train will leave and arrive at the same block.

You can also assign the target role to another block. Train Controller will then drive the loco from the start block to the target block. Train Controller will automtically choose a route.

In order to assign the target role, use the orange buttons in the AutoTrain dialog. The target block will also be marked orange in the layout view. The orientation matters. If you want a train to enter the target block from the left, you have to select the target button that puts the orange marker on the right side of the target block. The orange marker marks the end of the route.

After the start role and the target role have been assigned, click the ‘A’ button in the AutoTrain dialog to start the route. The loco will move over the layout and AutoTrain will control all switches to open the automatically choosen route.

Debugging

What if nothing happens? What if the route does not work?

  1. Verify that one of your locomotives is working correctly. Put that loco onto your layout. Use the Intellibox to manually control that loco. Now you know that the Intellibox can send commands to the loco.
  2. Check that the PC is connected to the Intellibox. Use the device manager to find the COM port (on windows) that the intellibox is connected to.
  3. In TrainController, edit the settings of the Intellibox. Use the correct COM Port. Control a switch manually in order to verify that Train Controller can talk to the Intellibox and the Intellibox sends commands to the layout correctly.
  4. In Train Controller, control a locomotive manually, that is without AutoTrain. I do not know how that works but you should be able to have a manually controlled throttle for your locomotive and the locomotive should accelerate and brake correctly.
  5. Try out AutoTrain after all steps above did work correctly.

Sometimes a locomotive does not run correctly. Try to put oil into the locomotive and try to push the locomotive over the layout manually in order to help it gain speed until it is able to run itself. A case was observed where TrainController and the Intellibox were working 100% correctly but the loco just was stuck on the rail and would not start the route!

You should test with your most trustworthy locomotive. Use a locomotive that never fails. Basically you want to exclude all sources of errors to narrow down the real issue.